When working with Webflow Collections, it's important to consider design and functionality as one starts building within the Designer. Without a bit of pre-planning, one may place the Collection in the wrong spot initially, limiting one's ability to enable conditional visibility options, for example.
This high-level example shows how to create a responsive notification banner that utilizes data from a CMS Collection called "Announcement Bars." For additional help, pixelgeek shows how to create a CMS driven notification bar along with a custom modal.

To create this top banner in Webflow:
- Create a generic div. Either now or later in the process, this div could be turned into a Symbol for easy re-use throughout a website..
- Within the div, add a "Collection List Wrapper." Since the banner above the top fixed navigation bar may not always be needed, add some conditional filters. This example relies on a filter to determine whether or not a banner is to display or not and then sorts based on which banner was updated most recently. Another approach would be to rely on publication date or to randomly display a banner (though - this may result in a different banner on each page, which could be confusing for site visitors). The Collection is also limited to only show one banner at a time in case past announcements or promotions are not switched off.
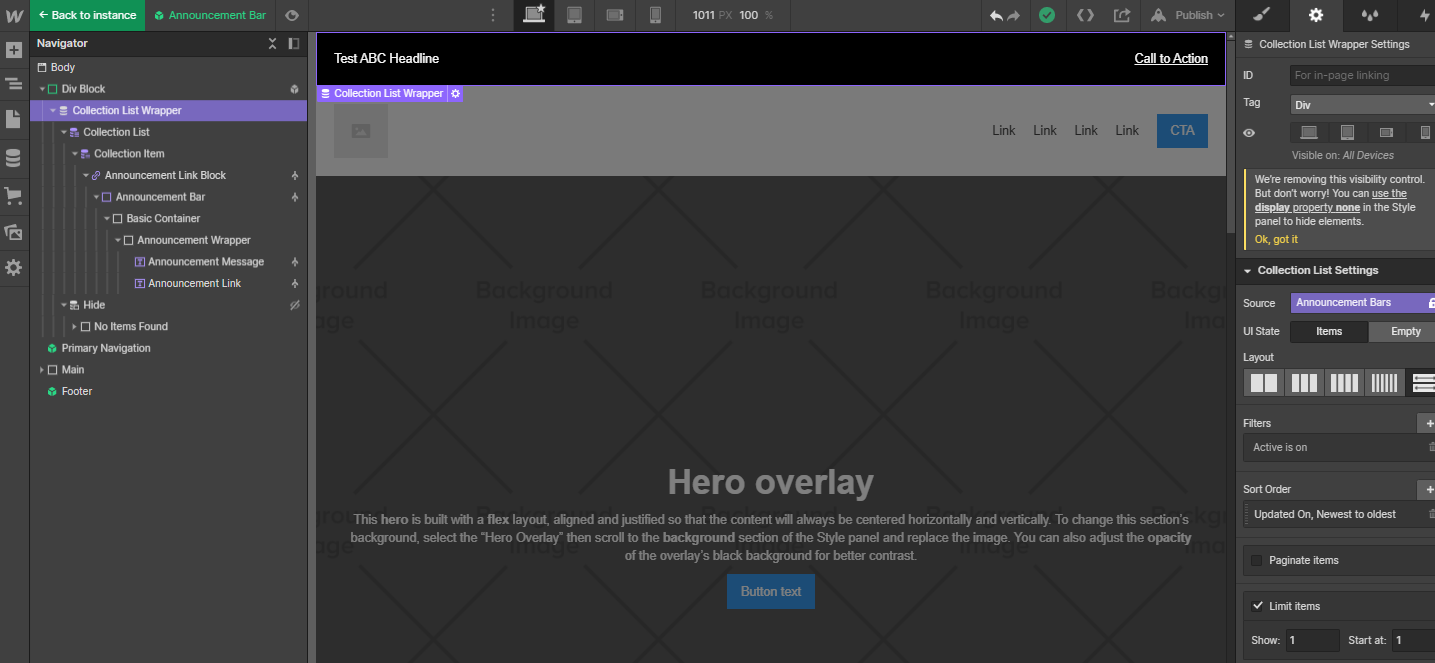
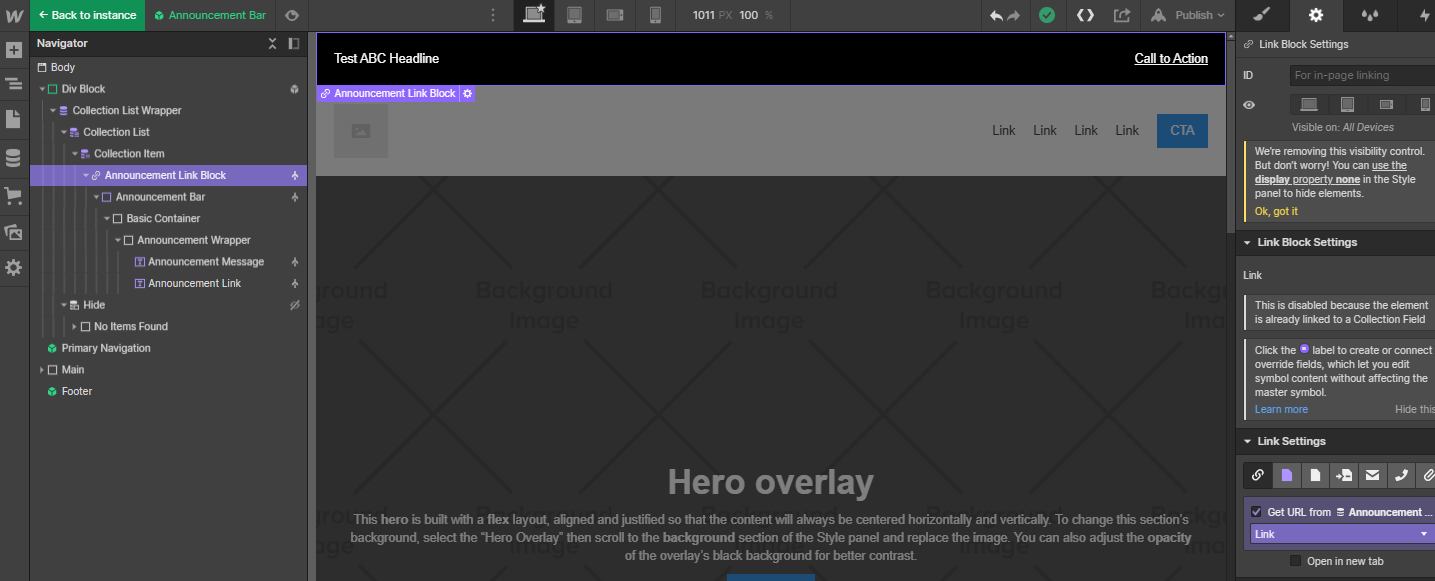
- Add in a link block element and give it a class name. As part of set-up, pull the link value from the Collection.
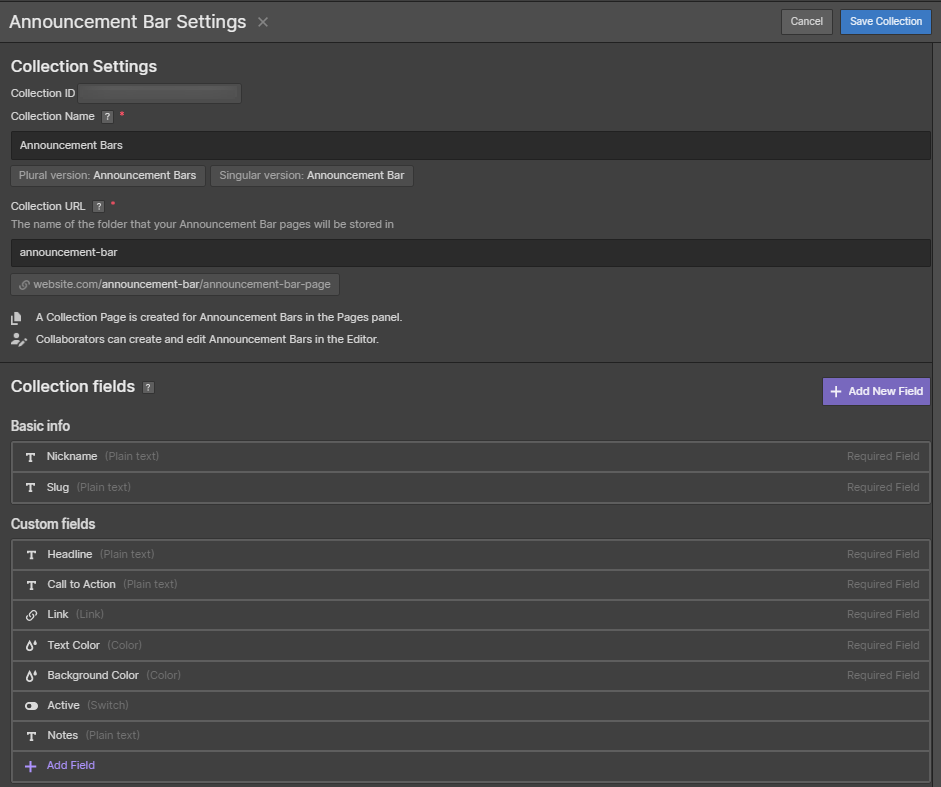
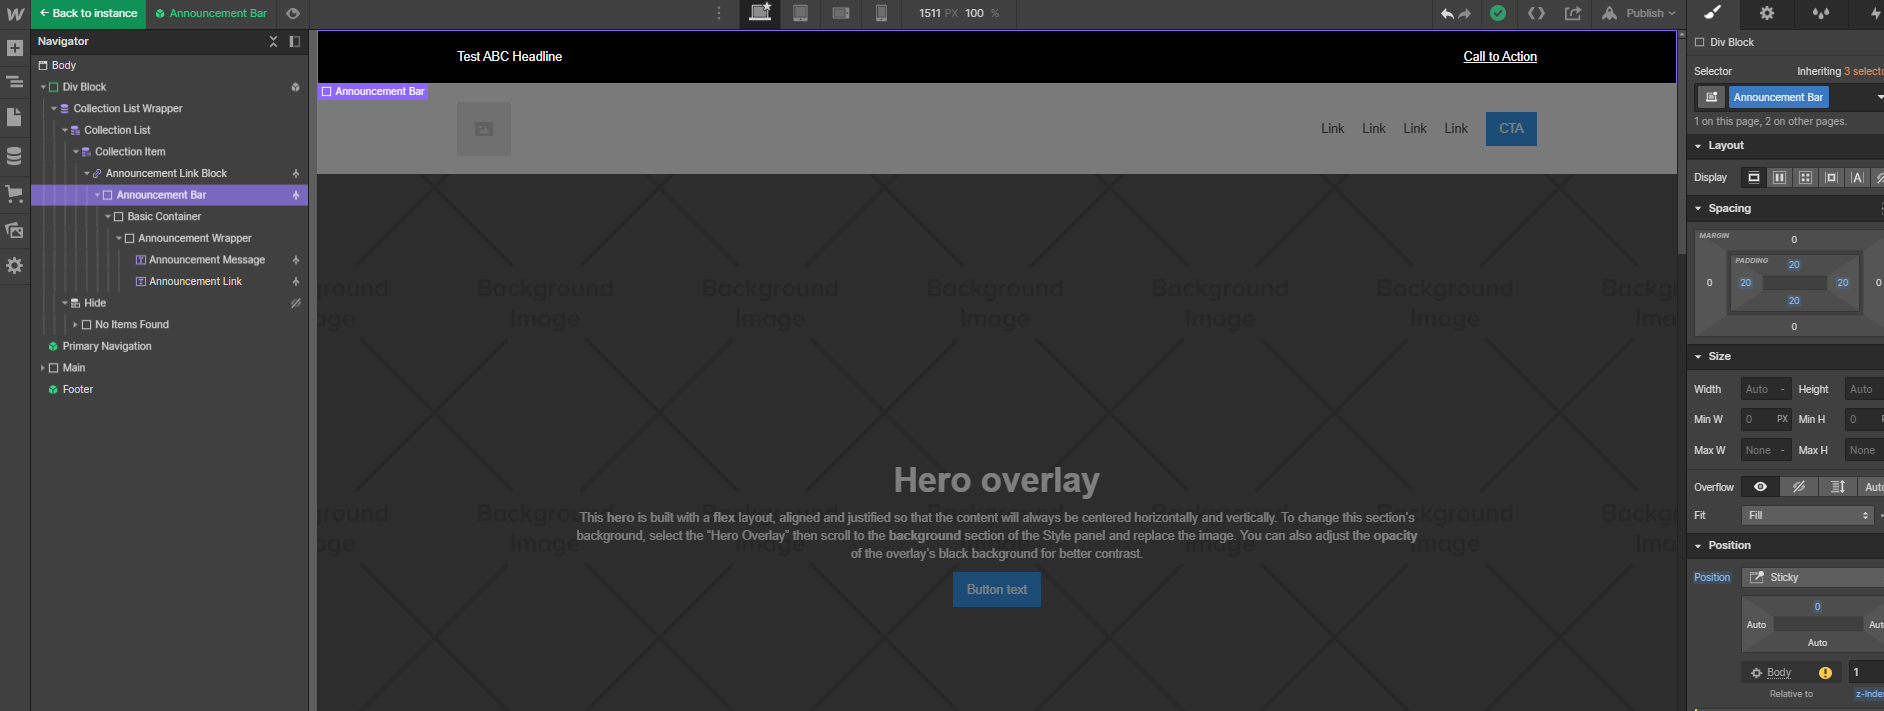
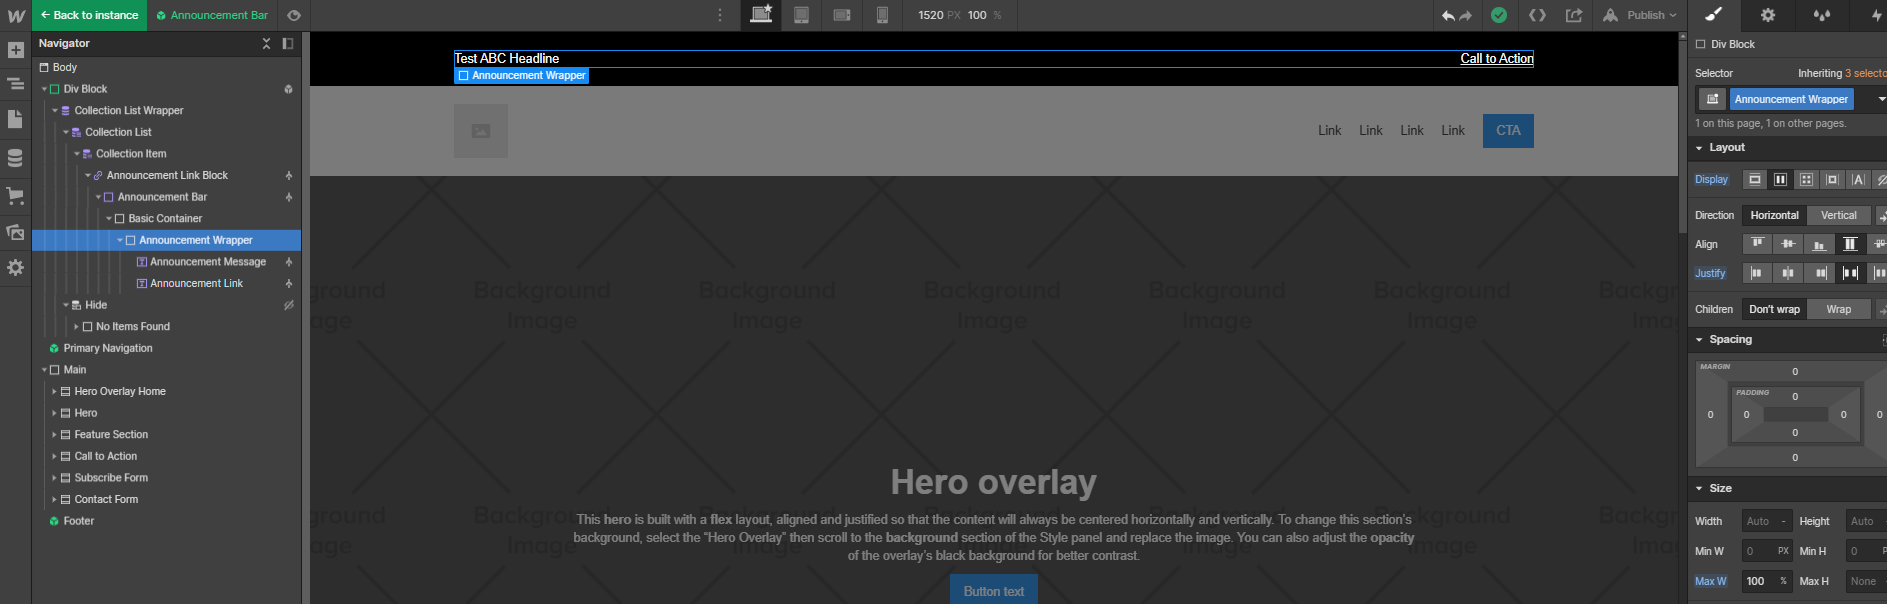
- Add a new div and give it a class name, like "Announcement Bar." It will rely on data from the "Announcement Bar" Collection for the background and text colors.

- Add in a div to constrain the maximum size of the Announcement Bar that is in keeping with the overall page design. In this case, a maxiumum width of 1200 pixels is set to "Basic Container."
- Add a div to hold the notification bar's contents. In this case, "Announcement Wrapper" is set to flex horizontal. Within this div are two text elements, each with their own styling and which pull content from the "Alert Bar" collection.
- For the "No data found" situation, a class "Hide" which is set to "display none" was created and applied.

let's keep in touch!
Receive once-in-awhile updates from the site and the world of #NoCode. Unsubscribe anytime.
Oops! Something went wrong while submitting the form.
Don't want yet ANOTHER email? Follow @colleenmbrady on Twitter.